
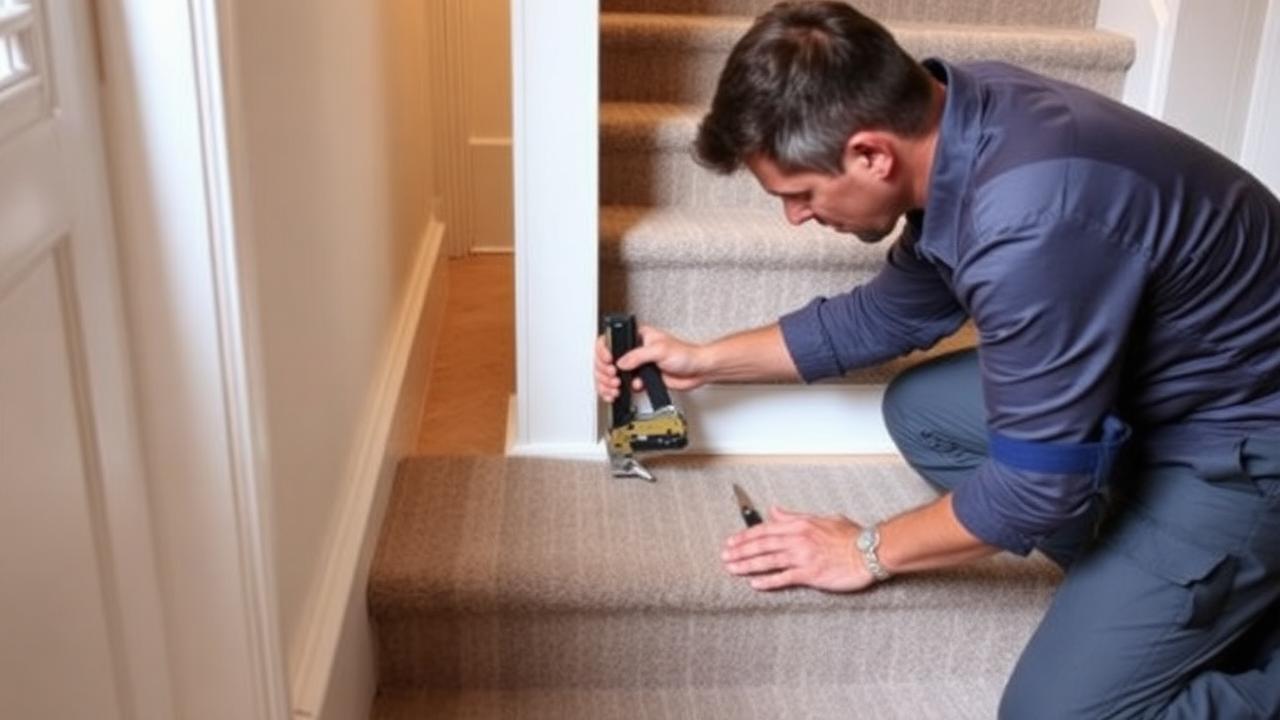
What 'laying' a runner actually means
Laying a stair runner is not the same job as laying a carpet. There is no room to stretch across, no seaming, no power stretcher and no underlay to cut around awkward corners. Instead you repeat one small operation — tension, seat, fix — thirteen or fourteen times in a row. That is why the job is realistically achievable at home in a day, and also why it is so unforgiving: the eye reads a flight of stairs as a set of parallel lines, so a single step laid 5mm off-centre or a single crease left slack is visible from the hallway floor.
The whole method comes down to four decisions you make before you touch a staple: how wide the runner is relative to the tread, whether the runner will be laid waterfall or Hollywood, whether it sits on gripper and underlay or is fixed directly to the timber, and where it starts and stops. Get those four right and the rest is patient repetition.
Before you start: length, width and layout
Every step consumes roughly the tread depth plus the riser height, plus an allowance for wrapping the nosing. On a typical UK or US domestic staircase that is about 10in of tread, 7.5in of riser and 1-1.5in of nosing, so 18-19in of runner per step before waste. A 13-riser flight needs about 20-21ft (6.1-6.4m) plus a tucking allowance at each end, and more again if the runner continues across a landing or the pattern has to repeat in the same place on every tread.
Width is a separate decision and it is aesthetic as much as practical. Standard runner widths are 24in, 27in, 30in and 32in (roughly 60-80cm). On a 36in staircase, a 27in runner leaves 4.5in of timber showing each side, which is the classic proportion. Whatever you choose, the exposed margin must be equal on both sides for the full flight — which is exactly why the centre line matters more than any other single mark you make.
| Staircase width | Runner width | Timber showing each side | Reads as |
|---|---|---|---|
| 30in / 76cm | 24in / 60cm | 3in / 7.5cm | Tight, modern |
| 36in / 91cm | 27in / 68cm | 4.5in / 11cm | Classic proportion |
| 36in / 91cm | 30in / 76cm | 3in / 7.5cm | Generous, more coverage |
| 42in / 107cm | 32in / 81cm | 5in / 12.5cm | Grand hallway |
Know your numbers in 30 seconds
Enter your step count, tread depth and riser height — the stair runner calculator gives you the exact length to order, in metres and feet, with waste included.
Open the stair runner calculatorTools and materials
- Hammer tacker or electric stapler with 14-16mm (9/16-3/4in) staples — shorter staples work loose within a season in softwood.
- Carpet gripper strip, cut to the runner width minus about 30mm, one length per step.
- Underlay: 8-11mm PU foam or 8mm crumb rubber, cut into tread-sized pieces.
- Knee kicker — the only practical way to get real tension into each crease.
- Bolster or stair tool with a blunt 3in blade to drive the runner into the angle without cutting it.
- Chalk line or laser level, tape, pencil and a square.
- Sharp trimming knife with hooked blades for the two end cuts only.
- Knee pads. You will spend the whole job on your knees on hard edges.
Order the runner bound
Ask the supplier to bind or serge both long edges before delivery. A raw cut edge frays faster on stairs than anywhere else in the house, because every descending foot brushes it. Site-binding is slow and rarely as neat.
Step 1: prepare the staircase
Lift any existing carpet, pull every old staple and tack, and run a claw hammer or pincers over the whole flight — a single proud tack head will telegraph through a new runner and eventually cut the pile. Screw down any tread that squeaks, from the top, into the riser or stringer below, and punch the heads below the surface. Vacuum thoroughly: grit trapped under underlay grinds at the backing for years.
If the treads have been painted or varnished, scuff the area under the runner lightly so staples bite predictably. If the stairs are bare and you intend to leave the margins exposed, finish those margins first — paint, stain or varnish them and let them cure fully before the runner goes down. Trying to cut in a paint line against a fitted runner is miserable work and never looks as clean.
Step 2: set out the centre line
Measure the width of the treads at the top and bottom of the flight. Staircases are rarely perfectly parallel; if the two measurements differ, split the difference and work to a single line rather than measuring in from one stringer on every step. Mark the centre of the bottom tread and the centre of the top tread, then snap a chalk line — or run a laser — up the flight to confirm they agree.
From the centre line, mark the runner edges on every tread and riser: half the runner width either side. Those pencil marks are your reference for the whole install. On a tapered flight the runner stays a constant width and the exposed margins vary slightly, which is correct and almost invisible; what is very visible is a runner that wanders.
Step 3: fit gripper strip and underlay
Cut gripper strip to the runner width less about 15mm at each side so it never shows. Fix one length into the angle where each tread meets the riser below it, pins pointing back into the angle, set about 15mm away from the corner so the runner can be tucked in behind. On the bottom riser, fix a second length at the base if the runner is finishing at floor level. Nail or staple the gripper down firmly — anything loose will rattle.
Underlay is cut to the runner width and deep enough to cover the tread and wrap over the nosing, finishing about 40mm down the face of the riser. Staple it at the back of the tread and along the underside of the nosing, pulling it tight over the bullnose so it cannot creep. Do not run underlay down the full riser: it adds bulk exactly where you want a crisp line, and it makes the crease look soft.
Underlay is not optional
A runner laid over 8-11mm underlay lasts roughly twice as long as one laid straight onto timber, because the underlay absorbs the crushing load at the nosing instead of the pile taking all of it. It also quiets the flight noticeably.
Step 4: choose waterfall or Hollywood
A waterfall fit lets the runner fall straight off the nosing to meet the tread below, leaving a soft rounded front edge. It is faster, uses slightly less material and suits looped and textured runners. A Hollywood (cap-and-band) fit pulls the runner tightly around the nosing and into the angle of every step, so the staircase profile shows through the carpet. It looks sharper, costs a little more length per step, and is the traditional choice for patterned and striped runners because it keeps the pattern square to the step.

| Waterfall | Hollywood | |
|---|---|---|
| Look | Soft, relaxed front edge | Crisp, tailored, shows the step profile |
| Length used | Slightly less | Adds roughly the nosing depth per step |
| Best with | Loop pile, textured, plain | Stripes, patterns, cut pile wool |
| Difficulty | Easier for a first-timer | Needs consistent tension on every step |
Step 5: lay the runner, bottom to top
- Start at the bottom. Turn a 40-50mm hem under the leading edge of the runner and staple it along the base of the bottom riser (or under the nose of the bottom tread if you are stopping one step up).
- Bring the runner up the riser face, checking both edges against your pencil marks before you fix anything.
- At the top of the riser, drive the runner into the angle with the bolster and staple through the crease into the gripper — staples set in the crease disappear completely.
- Lay the runner across the tread, then use the knee kicker to pull it tight towards the nosing. Two firm kicks, not ten light ones.
- Wrap the nosing. For Hollywood, pull it hard around the bullnose and staple beneath the nosing; for waterfall, let it fall and fix at the back of the tread below.
- Check the edge marks again. Correct any drift now, on this step — it never gets easier one step later.
- Repeat all the way up, keeping the tension identical on every step.
- At the top, tuck the runner under the nosing of the top step or take it onto the landing, hem the end, and staple it out of sight.
The rhythm matters more than speed. Fit one step completely — crease, tread, nosing, check — before you start the next. Fitters who try to lay three steps loosely and tension them afterwards end up with a runner that looks tight at the bottom and baggy at the top, because tension migrates upwards as you work.
Winders, half landings and curved flights
A winder step is measured at its widest point and the runner is laid so its centre line follows the walking line, not the geometric centre of the tread. In practice that means the runner shifts slightly towards the wide end of the wedge across the turn, then straightens up again on the next straight step. Most fitters cut and re-join the runner on winders so that each triangular tread carries a straight piece; the join sits under the nosing where it is invisible.
On a half landing, run the runner straight across as a continuous piece if the landing is shallow, or finish the lower flight cleanly at the landing edge and start a new piece for the upper flight if the landing is deep. Two neat ends look better than one badly aligned continuous run. Curved and helical flights almost always need a cut on every step, and are one of the few cases where paying a fitter is genuinely cheaper than the material you would waste learning.
Getting the tension right
Tension is what separates a professional-looking runner from a domestic one. Correct tension means the runner is drum-tight across each tread but not so tight that the pile distorts at the edges. Test it by pressing a thumb into the middle of the tread: it should feel firm, with no ripple travelling sideways. If a ripple runs to the edge, kick again and re-staple.
Wool runners relax slightly in the first few weeks as the fibres settle, so it is normal to walk the flight a fortnight later, find one or two steps a touch soft, and add a staple. Synthetic and flatweave runners hold their initial tension almost exactly, which is one reason they are more forgiving for a first install.
Common mistakes when laying a runner
| Mistake | What it looks like later | Fix |
|---|---|---|
| Measuring from one stringer | Runner drifts across the flight | Work from a chalked centre line |
| Staples too short | Runner lifts at the nosings | Use 14-16mm staples into gripper |
| No underlay | Bald patches on the nosings within two years | 8-11mm PU or crumb rubber |
| Laying top to bottom | Tension pushes slack to the bottom step | Always work upwards |
| Ignoring the pattern repeat | Motif lands differently on every tread | Add one repeat per flight to the order |
| Cutting to the exact calculated length | No room to adjust either end | Add 10-12in tucking allowance each end |
How long the job takes and what it costs
A competent DIYer should allow six to eight hours for a straight 13-step flight, including preparation. A professional fitter will do the same flight in two to three hours and charge roughly £150-£350 in the UK or $200-$500 in the US for labour alone, with winders, half landings and curved flights adding 30-100% to that. Material cost sits on top: most domestic runners land somewhere between £30 and £90 per linear metre, or $35 to $110 per linear yard, with underlay and gripper adding another 10-15%.
The economics usually favour DIY on a straight flight and a fitter on anything with a turn — not because the turn is impossibly hard, but because a mis-cut winder can waste more runner than the labour would have cost. Run your own numbers through the cost calculator before you decide.
Aftercare in the first month
- Vacuum with the beater bar off for the first two weeks while the pile settles and sheds loose fibre.
- Re-check every crease at the two-week mark and add staples where the runner has relaxed.
- Keep the exposed timber margins dry — most runner damage starts as water damage at the edges.
- If you fitted rods, re-tighten the brackets once after a fortnight of use.
Whatever you decide, get the numbers first: the stair runner calculator doubles as a stair runner length calculator, adding nosing wrap, landings, winders, pattern repeat and waste so you order the right length the first time.
Still deciding on material, width or pattern? Our hub on stair runners compares weaves, widths, backings and fitting styles side by side, then hands the numbers straight to the calculator.
Frequently asked questions
Do you lay a stair runner from the top or the bottom?
From the bottom upwards. Working upwards lets you push tension into each crease against the step above, and it puts any small length discrepancy at the top where it can be hidden under the landing nosing rather than on the very visible bottom step.
Can you lay a stair runner without gripper strip?
Yes — you can staple the runner directly through the crease into the timber — but it will not hold tension as well over time. Gripper adds a few pounds to the job and roughly doubles how long the runner stays tight, so it is worth fitting on any staircase you intend to keep the runner on for more than a couple of years.
How much extra runner should I order?
Add 10% waste on a plain runner, plus one full pattern repeat per flight on anything patterned, plus 10-12in of tucking allowance at each end. On a 13-step flight that typically turns a 20ft calculation into a 23-24ft order.
Should the runner be laid before or after painting the stairs?
Paint or stain the exposed margins first and let them cure completely. Cutting a paint line against a fitted runner is slow and rarely looks clean, and fresh paint under staples can stay tacky for weeks.
Can one person lay a stair runner alone?
On a straight flight, yes. A second pair of hands mainly helps with feeding the roll and holding the runner square on the first two steps. On winders and curves, working alone roughly doubles the time.
Know your numbers in 30 seconds
Enter your step count, tread depth and riser height — the stair runner calculator gives you the exact length to order, in metres and feet, with waste included.
Work out my runner lengthReady for real prices?
Get quotes from vetted stair runner suppliers and fitters near you. Free, no account, no obligation.
Every guide is written from hands-on measuring and fitting experience, checked against the calculator’s own maths, and re-reviewed whenever prices or methods change. Read our editorial standards.